WhatsApp Image 2024-04-09 at 11.28.46 AM
About Us

About Us

How WE work
Our first step was to look at the cockpit and try to visualize how we would like to see it when finished. If you are planning your own install imagine what would be the most convenient (and stylish) location for your Halyard Hangers, how much space you would like each hanger to have? Where would you like your sheets or halyards to be when you need them? What areas would you like more space or less clutter? This is your yacht make it exactly how YOU want it!

The first step we took for this install is not necessary but it is a helpful way to plan your Halyard Hanger install. We took common blue painters tape and laid out the locations for our hangers. Placing painters tape allows you to see the lines and to mark locations without having to mark your yacht. On this particular yacht the cabin top bulk head has a nice sloping line, we wanted to follow this angle and laying the tape made this very easy.
Meet our team

MEET OUR TEAM

The halyard hanger is brought to you by KVT innovations, a partnership of Ian Van Tuyl and Joseph Kline. Our goal is to bring innovative solutions to all those who love the yachting lifestyle.

Catch a great day’s entertainment on the water with your friends.

THE HALYARD HANGER IS BROUGHT TO YOU BY KVT INNOVATIONS, A SAN DIEGO BASED COMPANY FOUNDED BY IAN VAN TUYL AND JOSEPH KLINE. OUR GOAL IS TO BRING FUNTIONALITY AND STYLE TO THE YACHTING WORLD THROUGH INNOVATION.

Our Value

Let’s take a nautical adventure.

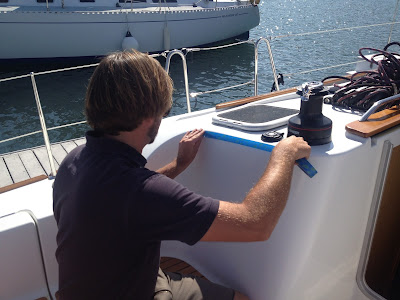
As you can see in the photo below marking on the tape allows you to make accurate marks and not mar your fiberglass. You also will want to check the reverse side (inside your yacht) and make sure you are going to drill into an area that is unobstructed.

The next step is the fun part, get your drill, and 11/64 drill bit and make those holes!

Vision

Lorem ipsum dolor sit amet, consectetur adipiscing elit. Ut elit tellus, luctus nec ullamcorper mattis, pulvinar dapibus leo.

Mission

Lorem ipsum dolor sit amet, consectetur adipiscing elit. Ut elit tellus, luctus nec ullamcorper mattis, pulvinar dapibus leo.

Our History

Halyard Hanger Step by Step Installation on Jeanneau 39i

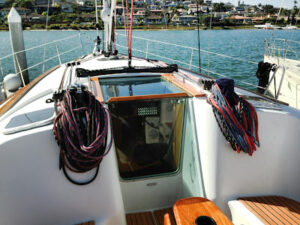
We had the pleasure of recently installing six Halyard Hangers on a Jeanneau 39i, this was a fairly simple install which made a world of a difference. On our last post we saw only the before and after photos, here we will go into more detail and see a step by step install with photos. As you will see the cockpit organization, sheet and halyard organization, and general looks were all greatly improved.

First off, here is the before photo again, this is how the yacht first appeared; not bad but messy, disorganized, and overall not ideal.

Our first step was to look at the cockpit and try to visualize how we would like to see it when finished. If you are planning your own install imagine what would be the most convenient (and stylish) location for your Halyard Hangers, how much space you would like each hanger to have? Where would you like your sheets or halyards to be when you need them? What areas would you like more space or less clutter? This is your yacht make it exactly how YOU want it!

The first step we took for this install is not necessary but it is a helpful way to plan your Halyard Hanger install. We took common blue painters tape and laid out the locations for our hangers. Placing painters tape allows you to see the lines and to mark locations without having to mark your yacht. On this particular yacht the cabin top bulk head has a nice sloping line, we wanted to follow this angle and laying the tape made this very easy.
0
    0
    Your Cart
    Your cart is emptyReturn to Shop